WordPress editorial system generates image thumbnails and crops only in the following sizes:
- Thumbnail (150 px, square cut);
- Medium size (maximum 300 px in width and height);
- Large image (maximum 1024 px in width and height);
- Original image (original size).
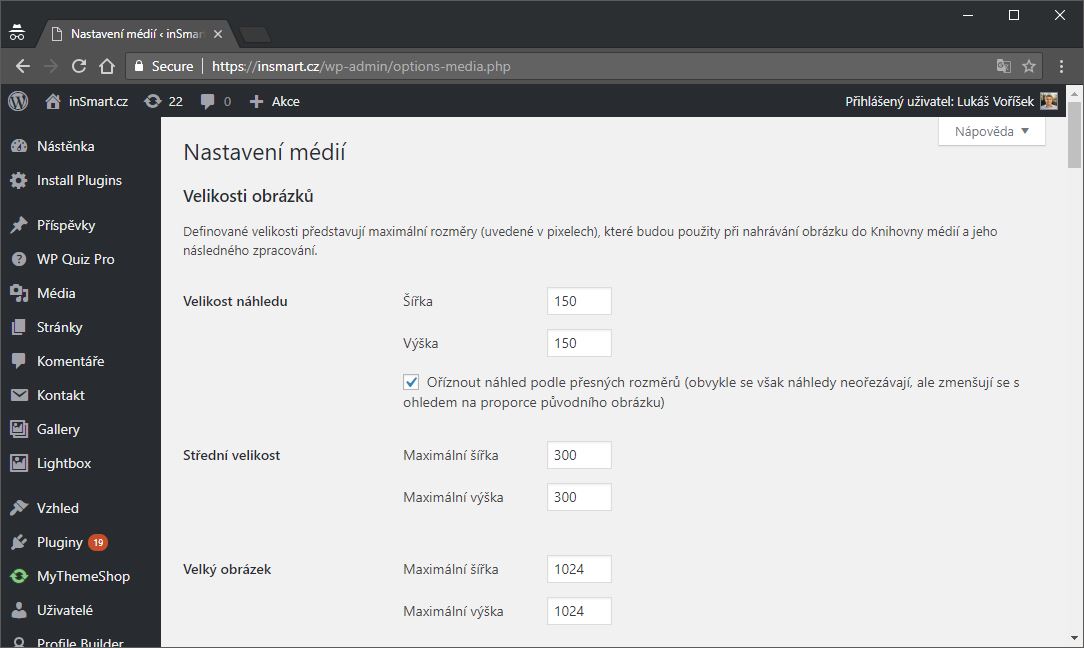
As you can see, the choice is not very large. Here's how to add custom crops and image sizes without having to edit the source code for your site.
Why is it important to generate previews of images in different sizes? If you use the original image sizes you uploaded everywhere (e.g. 1920×1080 pixels), it would mean that even in the place where the image is displayed on the 640×360 area, the original large size will be loaded in the background. The browser reduces the image for the visitor only after downloading. The page and its loading is thus unnecessarily slower, the user has unnecessarily downloaded more data and the server load is higher. This can be seen not only by a visitor to the site, but also by search engines that have been penalizing slower sites for some time with worse search positions.
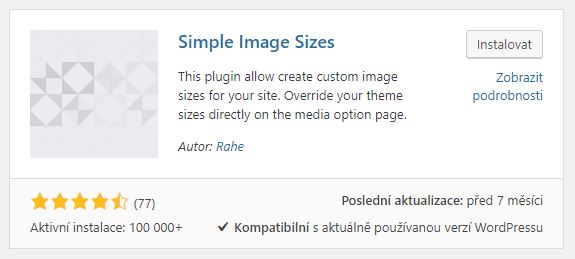
Simple Image Sizes – adding custom image sizes in a few clicks
The free Simple Image Sizes plugin is an elegant solution to create your own image sizes and crops. In addition to creating them, it provides clear settings of what dimensions the user sees in the editor and which are used only for the page template.
To install and set up the plug-in, proceed as follows:
- Navigate to the WordPress content management system site and select „Plugins“> „Install Plugins“.
- Search „Simple Image Sizes“.
- Select „Install“ and activate plugin by clicking the „Activate“ button.
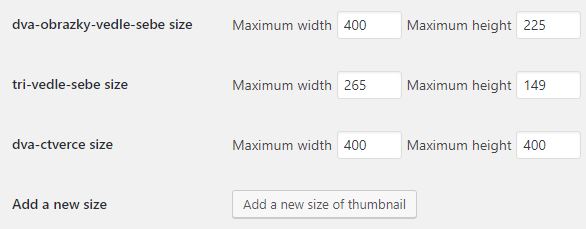
- Navigate to „Settings“ > „Media“, where you can see an overview of the defined image sizes.
- Navigate down and click the button„Add a new thumbnail size“ used to add a new preview size.
- After clicking select the name and confirm by clicking on „Validate image size name“.
- A new row with the selected title will be listed. Now select preferred width and height. Use the „Public name“ window to select a name you will see in the editor.
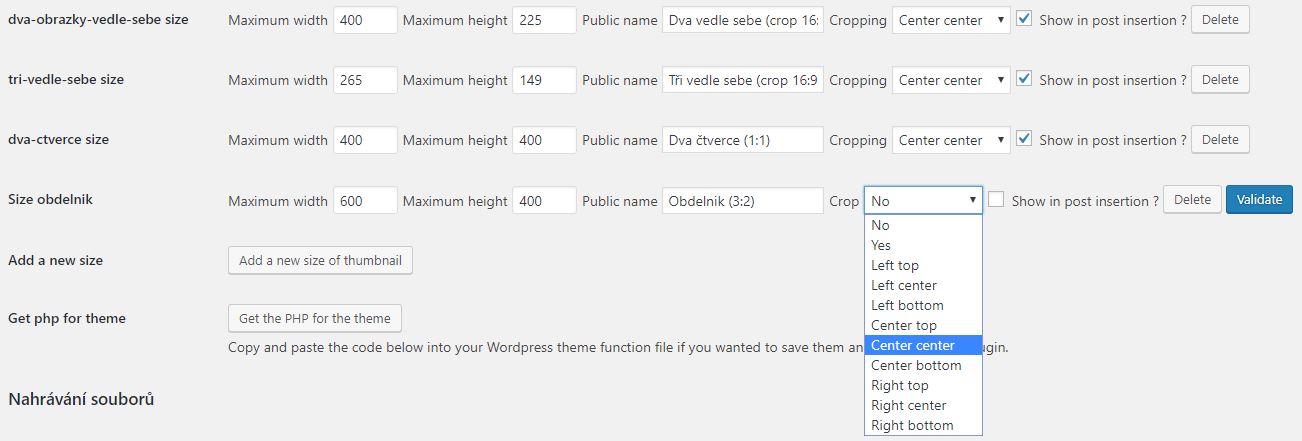
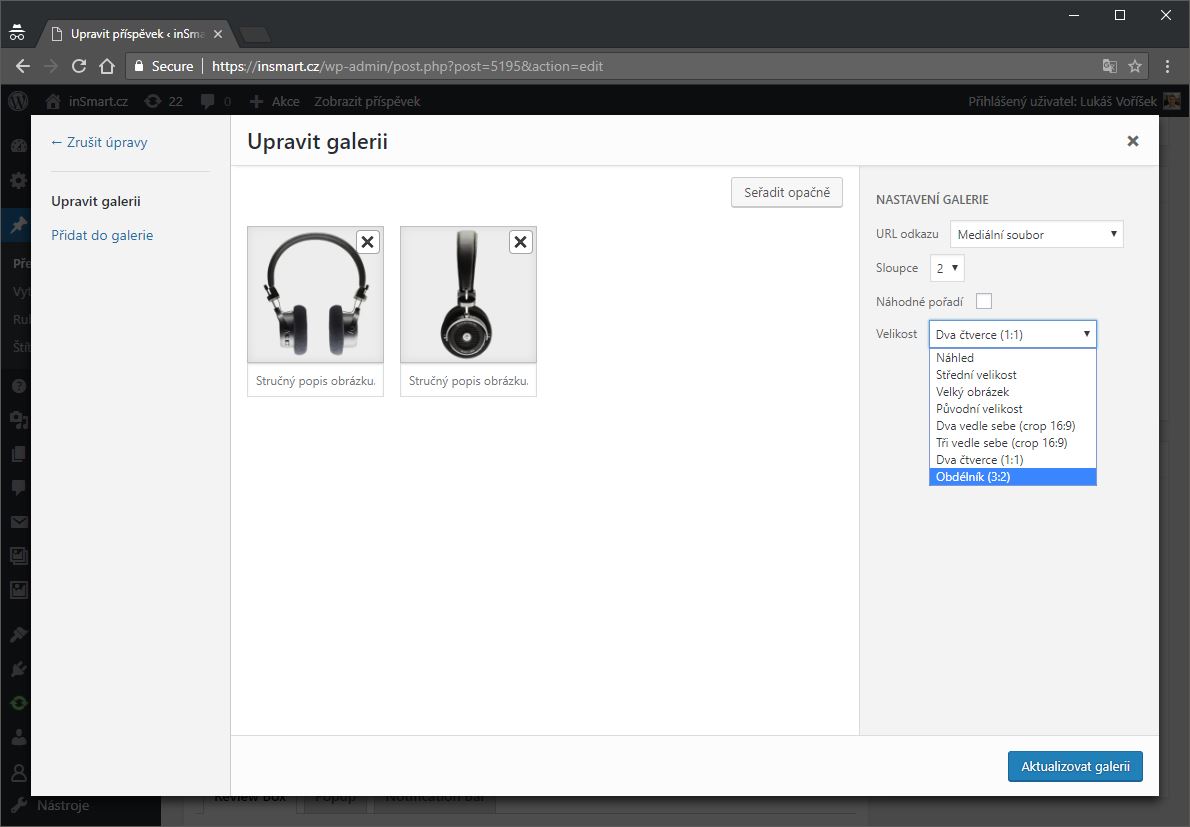
- The „Crop“ item si very important. This defines how the image will be cut, where it will be cut off and what will be preserved. The most common option „Center center“ marks the cut of the center of the image. However, it is up to you which cut you choose. If, for example, you know that an important part of the image in your case is regularly located in its lower right corner, choose „Right bottom“.
- The last choice is whether the new size will be displayed in the editor, that is, if you insert it into pages and articles. In our case, we have ticked the item and clicked the final button „Validate“.
- Now just upload a new image and you should see the option to insert it in a new dimension in the editor. This option will not be available yet for older images. Let´s now have a look at how to fix it.
Here you can see that four more image sizes which fit better into the content and correspond to the site template have been added to the original four image sizes.
How to regenerate image crops?
After creating a new image size and cropping, you can notice that the media files you uploaded before creating a new dimension can not be inserted into the article or page in a new size. The reason is that all dimensions and crops are generated at the moment they are uploaded. The plugin creators thought even about that and included the „Thumbnail regeneration“ feature.
You can find it on the same page as setting the image sizes in the menu „Settings“ > “Media“. At the bottom of the page, you can select which image sizes are to be regenerated. As a first thing, we recommend that you uncheck all sizes by clicking on the first box. Then just select the newly added dimensions created in the beginning and click the button „Regenerate Thumbnails“.
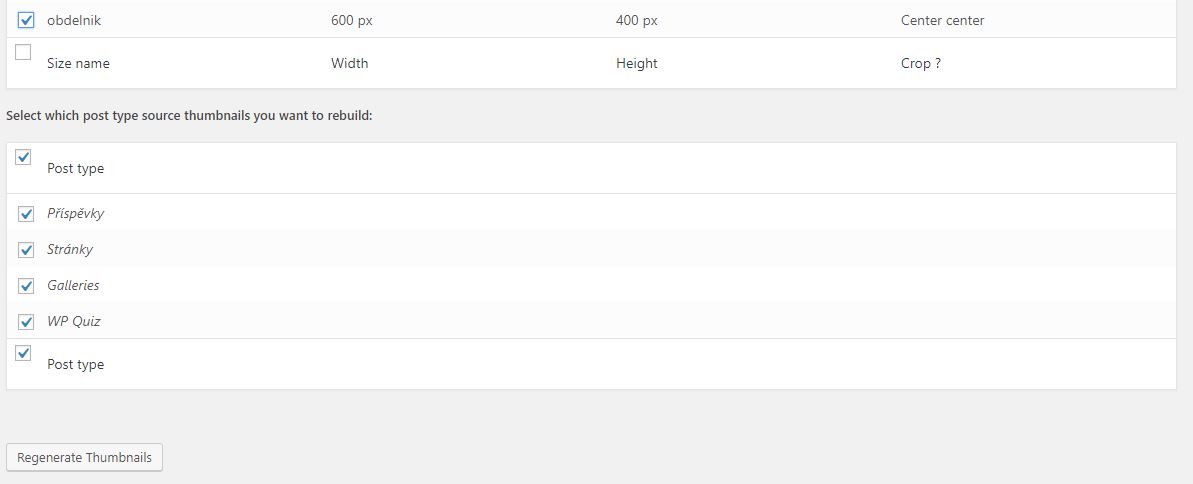
The amount of time it takes to generate new thumbnails will be calculated. Then just wait until everything is finished. After successfully generating previews, the editor will have the option to insert a new dimension for all images, including those uploaded before creating your own preview size.