1: Manual Migration via FT
First. "Manual migrate the WordPress website from one web host to another via FTP". It requires access to the database and FTP-details. The general process is:
- Make a back-up of your website.
- Buy a new Web hosting package at another Hosting company.
- Import the back-up of the existing WordPress website via FTP to the new host.
OPTION 1: Move WordPress website without domain change:
- Move the website files and import the database to a new hosting.
OPTION 2: Move WordPress website to new domain:
- BEFORE moving the WordPress website. Change the domain address in the administration panel on the current hosting company.
- Buy a new Web hosting package at another Hosting company.
- Move the website files and database to a new hosting.
- Change the entry in the wp-config.php file.
TIP: Visit the WordPress site to follow the detailed migration instructions.
2: All-in-One WP Migration plugin (within WordPress)
Second. The All-in-One WP Migration pluginn. It allows you to move your entire WordPress website from your existing to a new hosting. Within WordPress. Without data loss and downtime. No technical knowledge required. Including the database, media files, plugins and WordPress Themes.
Follow the next steps:
- Step 1: Choose, buy and install a new WordPress Hosting.
- Step 2: Install "All-in-One WP Migration" plugin.
- Step 3: Export the existing WordPress files.
- Step 4: Backup the complete WordPress website.
- Step 5: Import the backup data to the new hosting.
Step 1: Choose, buy and install a new WordPress Hosting.
First. Choose, buy and install a "new" WordPress Hosting package:
- Visit the ACTIVE24 website and choose Webhosting.
- Order and Pay online for your WordPress webhosting package.
- Login to the Active24 administration.
- Install WordPress with the "One-Click- Installer"
- You will receive your access login details at your contact e-mail address.
Step 2: Install "All-in-One WP Migration" plugin.
Second. Install and activate the plugin on your "existing" WordPress website. TIP: Learn how to install WordPress Plugins.
- Login to your existing WordPress website.
- Install the All-in-One WP Migration plugin here.
- Choose "Plugins", "All-in-One WP Migration" and "Activate" the plugin.
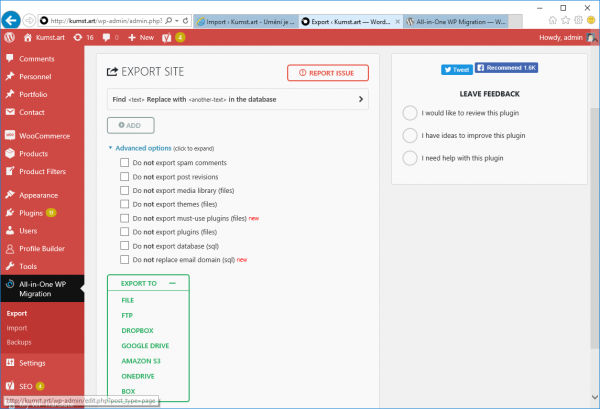
Step 3: Export the existing WordPress files.
Third. Now it is time to export your "existing"WordPress website.
- In the WordPress administration, click "All-in-One WP Migration" plugin.
- Select "Export to". Choose "File" to save the exported data to a file.

Step 4: Backup the "existing" complete WordPress website.
Fourth. Be sure to backup the complete WordPress website.
- Make a "complete backup" (1:1), or "export the pages without reviewing"
- This plug-in back-ups all "website files, settings, articles, and databases from WordPress, themes, and plug-ins".
- Download the complete file backup to your PC.
The duration may vary based on your entire WordPress website size.
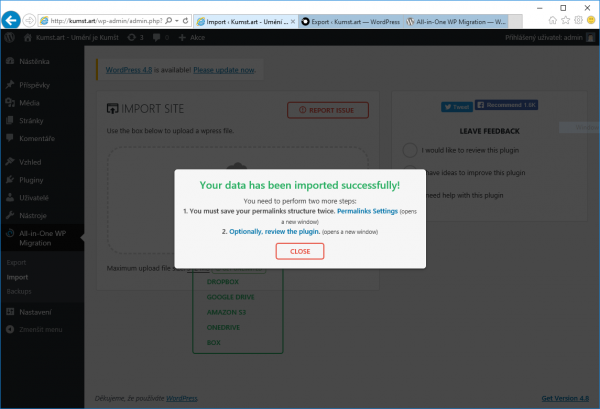
Step 5: Import Your WordPress Site to Your New Host.
Fifth. Upload the existing WordPress data to the "new" hosting.
- Login to your NEW WordPress website.
- Install the All-in-One WP Migration plugin here.
- Select "Import to". Choose "File" to save the imported data to a file.
- Upload the file to the new WordPress website.
The duration may vary based on your entire WordPress website size.
TIP: Choose to "Save the downloaded file as a backup" or "Delete it".
Now you have securely moved your WordPress website to a new hosting.